I did a little sewing recently, so obviously you know something must have been wrong.
You were right. Something was wrong. My girls were both down for naps and the Internet wasn’t working. And I had a really good audiobook, so obviously the only option was to break out the sewing machine.
Desperate times and all that.
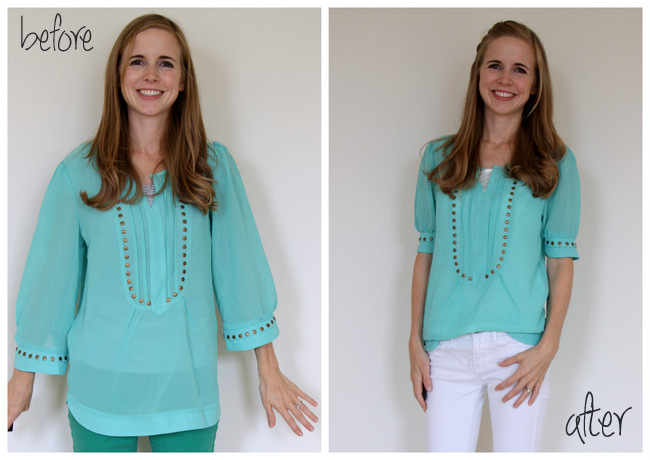
I got this shirt from SheInside and I really loved it, but the sleeves were too wide for my arms, plus I kind of liked the idea of making the sleeves a little shorter (sleeves that hit above the elbows are basically my favorite thing of all time. Right next to ice cream and sleeping babies).
By the time my girls woke up, my shirt was all finished. And my Internet was still down.
If you are inclined to take on such an amazingly (not) difficult project yourself, here’s how:
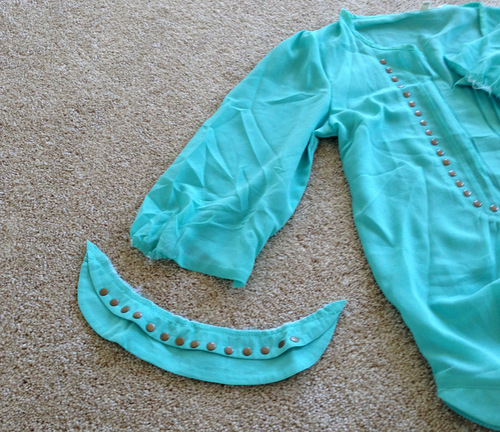
1. Use a seamripper or very sharp scissors to unpick the cuffs from the sleeve.
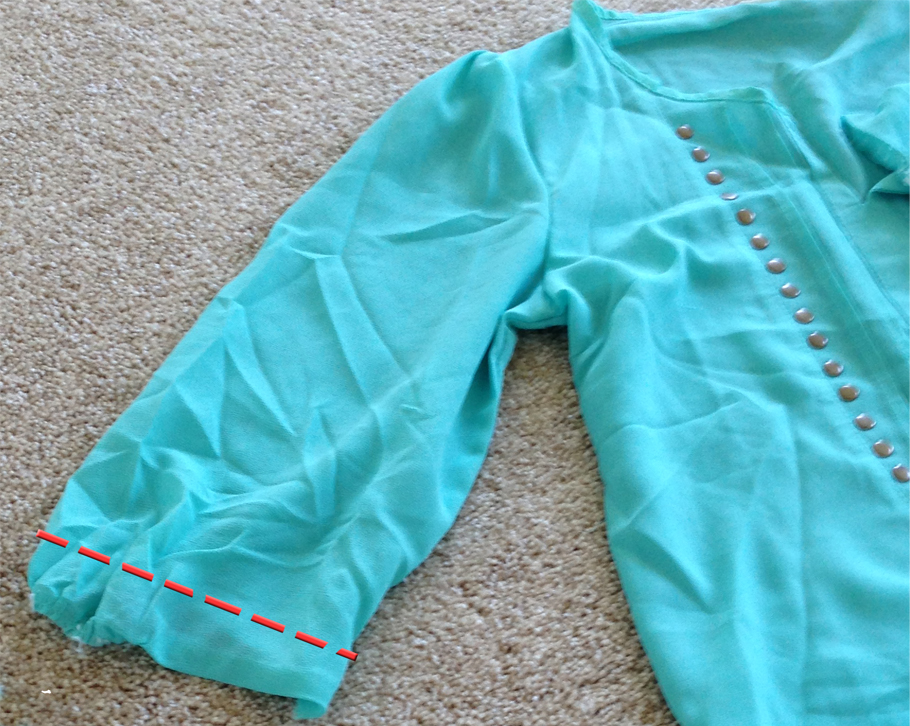
2. Try on your shirt and mark where you want the top of the cuff to hit on the sleeve. Cut your sleeves one inch longer than that.
3. Sew a loose seam around the cut edge, about 3/4 of an inch from the bottom, leaving several inches of thread on each end of your seam.
4. Carefully gather your sleeve by pushing the fabric along the loose stitching until it’s the same width as your cuff and the fabric is evenly distributed along the thread.
5. Fold your cuff with right sides together and sew a seam from top to bottom so it’s the right width to go around your arm. (Don’t make it so tight that it won’t slide over your elbow). Repeat on second cuff.
6. Flip your cuff inside out and slip it around the bottom of the sleeve with the raw edges of the sleeve and the cuff together. Pin it to keep it all in place. Sew around the cuff and sleeve to attach them together.
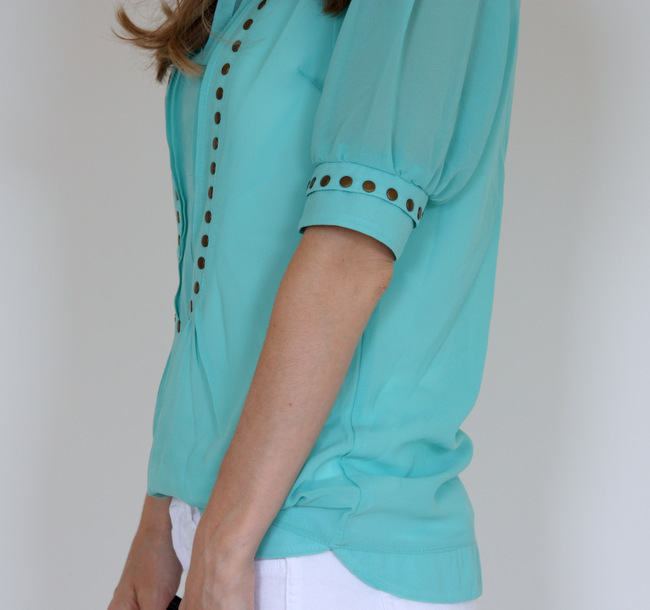
7. Zig-zag or serge the raw edges, flip the cuff down and ta-da. Done!
i agree i LOVE above the elbow sleeves, and this turned out super cute!!
Very nicely done!!
i think you should contact SheInside and be like "yo! this is how this shirt should go down!" b/c i'd definitely buy the after but not the before.
Whoa! What a difference!
brilliant.
(and ditto Erica)
I love the color, fabric and fit!
Yes, the after is much better. The before shirt is just….weird. Great job!
Bravo! I like to sew but I would be far too afraid of turning into a total disaster…even though you claim it's was easy! Looks a million times better than before!!
Very nice. I am thinking of doing some sewing myself, for the first time in many years, so you are an inspiration. And I think the finished product looks great.
I love this! It's so simple, but it completely fixed that oddness from before. You've opened possibilities to me.
Yeah… Why aren't there more elbow sleeves?
Also I clicked the link to the purchase site. I can see why you bought it. It looks much prettier when it is not on a model. The site shirt is displayed so as to not show how puffy those sleeves are. It isn't just the length that improves it….the gathers are a really nice touch.
Looks way better! I should do this to some of my shirts, I definitely look best in sleeves that length. And for someone that doesn't like to sew, you do such a good job!
Soooo much better. Great job!
It looks SO good! I would have never given the original shirt a second glance, but I really REALLY like the end result. Can I just buy that shirt and send it to you to alter for me? hahaha
such a great after!
Thank you for sharing. I like this clothes and you looks beautiful! Buyincoins,where you can buy good products from China directly without any shipping fee.
Super cute! While I do not sew and will not be following the tutorial, this post almost makes me wish I did.
That's how it should have looked! Great job x